It’s getting to that time of year when the green-fingered among us like to get out in the garden to undo the damage of winter. An easy way to reward all the hard work you’ve put in is to invest in some LED garden lighting, so even after the sun goes down, you can enjoy the fruits of your labour.
With that in mind, we’ve put together an exhaustive guide to LED garden lighting, to help you choose the perfect lights for your outdoor space.
Pathway lighting
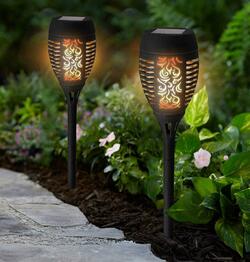
Garden lights come in many forms, from solar spike lights to battery-powered fixed spotlights that can be used as an alternative to traditional outdoor floodlights. What they are all good at is providing a bright, focused beam of light. This can be used for everything from illuminating your favourite garden features to providing some additional security lighting for entrances and driveways.
Deck lighting
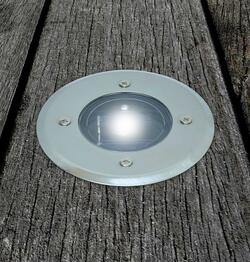
Deck lighting comes in many forms, from recessed light fittings that slot into the surface of your decking to strip lighting and other ambient lights. They are intended to be stylish, unobtrusive lights that will instantly make any decking look better.
Wall lights
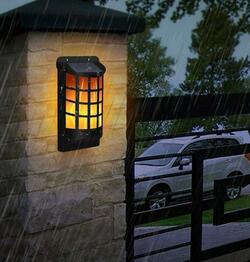
Wall lights are some of the most stylish fittings you can install in your garden. You can find everything from sleek, modern chrome wall lights to more traditional lantern-style lights. They are usually mains powered, so require some electrical expertise to install, but the extra effort is worth it.
Floodlights
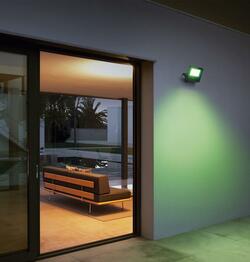
Outdoor floodlights are essential for any home, for safety and security. They are typically wall-mounted, mains-powered fittings, and they offer a very bright light. You can find floodlights to suit any size of space, from small gardens and driveways to entire car parks. LED floodlights offer incredible value for money, thanks to their energy efficiency and long lifespans.
String and festoon lights
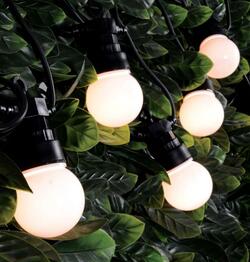
Festoon lights and string lights (or fairy lights) are made up of a long cable with light bulbs attached at regular intervals along its length. String lights usually have small, fixed light bulbs attached, while festoon lighting uses larger light bulbs that can be individually replaced. Both types of light can create a cosy, attractive ambience in your garden. String lights are slightly more versatile, as they can be strung through bushes and trees, while festoon lighting is better for illuminating larger spaces.
Power options – pros and cons
Solar-powered
Solar-powered garden lights are by far the easiest to install and require little to no maintenance. The batteries are rechargeable and will last for a long time before they need replacing. Solar technology is also very versatile and can be found in many types of ambient outdoor lighting.
On the downside, they can vary wildly in quality, so it’s important to look at the specifications of a lamp and consider the balance of price and quality. They’re not as bright as battery-powered or mains powered lighting, and their performance depends on the amount of sunlight they receive. If you have a shady outdoor space, solar lighting probably isn’t the right option.
Battery-powered
Battery-powered garden lights offer a great middle-ground between solar lighting and mains powered lighting. They’re usually not too difficult to install, as they don’t need any additional wiring, and they’re brighter than most solar lights. Many ranges also feature integrated sensors that allow the light to activate only when darkness and/or motion is detected.
Batteries run out, however, and the biggest inconvenience with battery-powered outdoor lighting is having to get back up that ladder to swap them out with a fresh set.
Mains powered
If you want the brightest, most powerful outdoor lights, then mains powered lighting is the way to go. From stylish LED wall lights to powerful floodlights, hooking your outdoor lighting up to your mains circuits really unlocks the potential for what you can do with it.
The biggest downside, of course, is that it can be much more complicated to set up mains powered lighting. Some fittings require a suitable IP-rated outdoor socket, while others will need the expertise of a professional electrician. If you can stomach the extra inconvenience of installing them, however, mains powered outdoor lighting can transform your garden.

Getting started
What do you want to achieve with your lighting?
It’s worth considering ahead of time what you want from your garden lighting, as it will help you narrow in on the right products. For example, if you know that you’re after a security light, then a solar stake light isn’t going to be up to the task. This is an obvious example, but the same goes whether you’re looking for path lighting, decorative lighting or anything else. Think about the why and the what will follow. Breaking your garden down into zones (read on) helps with this.
Is there space for the lights?
Now that you’ve decided what it is you really looking for, it’s time to find out if there’s actually space in your garden. It’s the most annoying feeling to find that your brand new floodlight is blocked by a drainpipe or boiler flue. Check a product’s dimensions carefully and if you’re not sure about the fit, measure up before buying. Having to shift a wall light down even a few inches can make a big difference.
Similarly, if you’re installing spike lights, check if the ground is actually soft enough. Take a length of cane and see how far you can push it into the earth. If you find that the ground is more solid underfoot than you thought, it can prove frustrating trying to dig a solar spike light in securely. Planning these things beforehand can potentially save a lot of time in the long run.
Break your garden down into zones
Less is often more when it comes to garden lighting, and having several different types of light competing with each other in a small space can have a detrimental effect on the look and feel of your garden.
To help design the perfect garden lighting, try breaking your garden down into zones, and pick lights to make the most of each one.
Porches and entrances
Porch and doorway lights need to be functional as well as decorative. Modern wall lights offer a stylish way to illuminate your front door, while a battery powered spotlight offers a bright, directional light that provides a bit more security.
Paths and driveways
Lining paths and driveways with solar stake lights can create an attractive, welcoming feel to your garden, but you need ground soft enough to accept the spike. For some extra security for your car, direct a motion-sensitive LED floodlight or spotlight at your driveway to help deter unwanted guests.
Patios and decking
Patios and decking are often the most social spaces of a garden, so a warm, relaxing light in these areas is perfect. Recessed deck lights are purpose made for the job, while striplights and freestanding, battery-operated lanterns offer a cosy light and can be placed anywhere.
Trees and bushes
Tree lights aren’t just for Christmas! Make those natural garden features dazzle by wrapping them in cosy string lights, or if possible, hang a battery-powered lantern from a lower branch for a vintage, fairytale look. Alternatively, you can create a dramatic effect by pointing solar spotlights up into the trunk and branches of trees.
Lawns and flowerbeds
Soft lawns are the perfect terrain for spike lights. Pathways look more welcoming when they’re lined with spike lights while placing lights in or alongside flowerbeds will make the most of those plants you worked so hard to cultivate.
Walls and fences
Break up flat, boring walls with stylish wall lights to turn them into decorative features of their own. If you don’t want to go down the mains powered route, solar LED spotlights can provide a similar effect when pointed up at walls.
Water features
It’s imperative that any lights installed in damp or wet areas are suitably IP protected. Lights specifically for underwater installation must be completely watertight, otherwise you run the risk of damaging the light irreparably, and chances are the warranty won’t cover it. Read on to learn more about IP ratings.
Garden benches and tables
Garden tables and benches would benefit from soft white light to create a relaxed ambience. Try placing solar spike lights at the feet of a garden bench (providing the ground is soft enough), or simply place a battery-powered LED lantern on garden table tops.
Gazebos and covered furniture
You have more flexibility when installing lights in more permanent garden structures. You could install mains powered deck lights in a wooden gazebo, for example, or stylish wall lights. Spotlights offer a nice bright light, but be careful not to overdo it; if they’re too bright, they could cause an unpleasant glare.
Things to think about when choosing LED garden lights
IP ratings
As we’ve already mentioned, IP rated lights are ideal for gardens, as they will continue to work in adverse weather conditions.
The IP stands for Ingress Protection, and it denotes how protected a light is from the ingress of water and solid objects. It is made up of two numbers, the first of which tells you how protected the equipment is from solid objects, the second how protected it is from water. The higher the numbers, the greater the protection.
For solid objects, the rating can be between 0 (not protected) and 6 (completely dust-tight), while for water, the rating goes from 0 (not protected) to 8 (completely watertight and suitable for immersion in water up to 1 metre deep).
For outdoor areas, look for lighting with an IP rating of at least 44. This means it will be protected against the ingress of objects up to 1mm in size (so most soil and dirt) and will withstand splashing water.
If possible, look for IP65 rated lights. These offer excellent protection and will withstand even the most extreme of British weather, and even directional water jets, such as hosepipes. Ratings above 65 and 66 are rare, and only really necessary if the equipment is going to be exposed to heavy amounts of water.
Read a more in-depth explanation of IP ratings.
Brightness
A light’s brightness is obviously one of it’s biggest characteristics, and with LED garden lighting, it is even more important. An LED security light, for example, must be bright enough for its intended purpose, while solar-powered path lighting doesn’t need to be bright enough to light every nook and cranny of your garden.
When determining the brightness of a light, look for its lumens (lm) rating. The higher this rating, the brighter the light. Most standard solar LED lights will have a lumens count of between 5-10lm, while more powerful solar spotlights might be between 15-25lm.
At the other end of the scale, outdoor floodlights are designed to be bright, so can have a lumens count of anywhere between 800 and 22,000lm! Those at the higher end of the scale are designed for more commercial spaces, such as the illumination of car parks, and are unsuitable for gardens. To get a rough idea of what sort of brightness you should be looking for in a floodlight, have a look at the table below.
| Area | Lumens |
| Small Patio | 500lm |
| Driveway | 1500lm |
| Small Garden (50m²) | 1600lm |
| Medium Garden (150m²) | 2400lm |
| Car Park | 9000-20000lm |
Read more about lumens – including what the difference is between lumens and watts.
Lifespan
Everyone wants their lighting to last as long as possible. One of the inherent benefits of LED lighting is that it lasts much longer than traditional incandescent lighting. A halogen floodlight (or the light bulb, at least) might give you 2,000 hours of use, while an equivalent LED floodlight can easily last more than 20,000 hours, ten times that of a halogen light.
To put that into perspective, even if you had the LED floodlight on for eight hours a night, every night, it would still last for around seven years before it needed replacing. The halogen version, on the other hand, wouldn’t even last a year.
PIR motion sensor floodlights will last for even longer, as they only activate when they detect a presence. This helps to minimise wasted energy and extends the lifespan of the fitting considerably.
Standard switching vs PIR sensors vs dusk till dawn lighting
Have you considered how you want your lighting to activate?
When choosing LED security lighting, in particular, you have a range of options for switching the light on and off. You can use a standard switch to do it manually, although there’s always the risk of leaving the light on during the day, wasting energy and shortening its lifespan.
Passive infrared (PIR) motion sensor floodlights, on the other hand, only activate when a presence is detected. This is the most energy-efficient option, as the light is only active when it needs to be, although the sensor can sometimes pick up the movement of animals or neighbours in their own gardens.
Finally, ‘dusk till dawn’ floodlights contain light sensors that allow them to activate only when it gets dark enough outside, switching off again in the morning when it gets bright enough. These offer a middle ground between standard floodlights and PIR floodlights, as they will be on throughout the night, but you don’t need to worry about switching them off again during the day.
How to install LED garden lighting
Solar spike lights
To reiterate, solar LED lighting usually requires no special skill and little to no equipment to install. Follow these simple instructions to have your solar lighting installed in no time
- Find a location that receives plenty of sunlight. If it’s too shady in your garden, you might not get the optimal performance from your lights
- Check the ground is soft enough to accept the spike. To determine if the ground is suitable, see if you can push a piece of cane far enough into the ground beforehand
- Check the underside of the fitting to see if there is a tab that needs pulling out to activate the light. If so, remove it
- Push the spike firmly into the ground, without forcing it. If you can’t push the light into the ground easily, check to see if there are any stones or pebbles impeding it.
Battery-powered lights
Battery-powered outdoor lighting can usually be installed with just a little DIY know-how. If you’ve ever hung a mirror, shelf or picture frame, you should be capable of installing this type of light.
- Measure the space where the light is to be installed, to check it will fit
- Clean/clear the surface. Walls and facias in outdoor areas can easily get slippery or greasy, so make sure it is clean before you mount the light. Also check for any obstructions (screws, wiring etc).
- Hold the light’s backplate up to the spot where it is to be installed and mark it with a pencil. Mark where the holes need to be drilled.
- Check that the light actually works. It’s much better to do this before you’ve gone through the trouble of fixing it in place. Once you’re happy that the light functions, remove the batteries.
- Drill a pilot hole using a narrow drill bit. This will make it easier to guide the drill when using a wider bit. Ensure you’re using the correct type of drill bit (e.g. a masonry bit when drilling into stone)
- Use wall plugs/rawl plugs when drilling into stone to ensure a secure fit. Hold the plug up to your drill and mark its length on the bit with a piece of tape. This will help you drill to the right depth.
- Using an appropriately sized drill bit, drill the hole for the plug. Hold the drill straight and don’t move it around while drilling.
- Push the wall plugin with your finger. It should be a tight fit. You might need to tap it lightly with a hammer towards the end, but be careful not to bend or snap the plug.
- Screw the light’s backplate into the holes you’ve just made. Don’t fully tighten the screws straight away. Once you’re satisfied with the placement, tighten the screws.
- Replace the batteries in the light and fit it onto its backplate. Depending on the light, it might just slot into its mount, or it might be bolted on.
Mains powered deck lights
If you have an IP rated outdoor socket installed, fitting deck lighting isn’t too complicated. It’s worth spending plenty of time determining the placement of each light, as once you start drilling, you can’t undo it!
If you don’t have an outdoor socket fitted, consult an electrician to have one fitted before you install your deck lights.
- First, check you have an IP rated outdoor socket fitted near to your decking. If not, consult a professional electrician to get one fitted.
- Remove your deck lights from the packaging and plan where they will be placed in your decking, whether on the facias (sides) or top surface. Mark each light’s position on the decking with a pencil.
- Using an appropriate drill and bit, drill mounting holes in the boards, ensuring that you’re not drilling into the main joists of the decking.
- Once you’ve drilled the mounting holes, remove the facias and boards on top of the decking, and drill holes through the joists to feed the wiring through.
- Mount each light into its hole and connect the cable at the back. Ensure any blanking plugs/plates are screwed into each light as you go.
- Once all lights are mounted and connected, connect the transformer. Stow this away under the decking before you fix the boards back in place.
- Plug the lights into your outdoor socket and check that each one is working. If not, unplug the lights again and check that each one is mounted and connected correctly.
- Once you’re happy that all the lights are mounted and working correctly, secure any loose boards in place.
Mains powered floodlights/spotlights
Mains-powered lights are by far the most complicated to install, as they require some understanding of household electrics, and the process usually involves running cables through the cavity of your house.
Always think safety first when wiring a light. Are you up to the task? If you’re not confident or experienced with wiring a light onto your mains circuits, please consult a qualified electrician, who will be able to do it safely and to a good standard.
If you are confident that you can wire an outdoor light, these detailed instructions from the DIY Doctor will provide all the information you need for the task.



What a grand idea for garden lights! I love seeing solar lights hanging on shepherd hooks instead of the usual stake in the ground. They add an element of grace to your pathway !!!